Mastering the Art: A Guide to Preparing Interior Walls for Painting Like a Pro
Transforming your living space with a fresh coat of paint is a simple yet powerful way to revitalize your home. However, meticulously preparing your interior surfaces is the secret to achieving flawlessly smooth walls. Don’t postpone your redecorating plans until your room is fully furnished; take the lead now. A well-prepared wall ensures superior paint adhesion and sets the stage for a smooth and even finish. Let’s delve into the essential steps to expertly prepare interior walls for painting while addressing common homeowner concerns.
Unveiling the Secrets: How to Prepare Interior Walls for Painting Like a Pro
Safeguard Your Space and Prepare the Area
– Prioritize the protection of your room before commencing the painting process.
– Cover the floor with dust sheets and safety covers.
– Carefully move furniture to the room’s center, ensuring it’s shielded.
– Organize tools within easy reach and maintain adequate ventilation by opening windows.
Cleanse & Prepare Interior Walls for Repairs
– Use a broom or cloth to cleanse the walls before any surface repairs.
– If walls have any dirt or residue, a soap and water mixture can remove them.
– After cleansing, rinse the walls and allow them to air dry thoroughly.
– Organize tools within easy reach and maintain adequate ventilation by opening
Eliminate Nails, Flaky Paint, and Hardware
– Efficiently remove cracked or peeling paint with a scraper and sandpaper.
– For larger areas, opt for an electric sander.
– Clear the surfaces of hardware, screws, nails, and any adhesive residues, ensuring a flawless canvas for your new paint.
Smoothing and Sealing The Walls
Inspect and Repair Damages
– Thoroughly inspect your walls for gaps or cracks.
– Fill any imperfections to guarantee a smooth surface.
– Fix holes with drywall mud and allow the mud to dry completely before proceeding to sand and achieve a smooth finish.
Sand the Walls to Perfection
– Sanding is a crucial step in achieving smooth walls.
– Utilize sandpaper or a sanding block to dull uneven surfaces.
– Wipe away dust with a damp cloth and let the surface dry.
– Employ fine-grit sandpaper for water-based paint and medium-grit for oil-based paint.
Prime Your Walls for Excellence
– Primer serves as the foundation for a high-quality paint job.
– Apply primer to porous walls or areas with visible stains for optimal results.
– Never underestimate the significance of primer in achieving a uniform finish, concealing flaws, and facilitating paint adhesion.
– Address any mold or mildew concerns before applying primer.
Prepare for the Painting Process
Select High-Quality Paint
– Choose a premium-quality paint with a smooth consistency.
– High-quality paints tend to level better, reducing the visibility of brush strokes and roller marks.
Use the Right Tools
– Opt for high-quality brushes and rollers suitable for the type of paint you’re using.
– A high-quality, shorter nap roller can help achieve a smoother finish on walls.
Mix the Paint Thoroughly
– Before applying the paint, stir it thoroughly to ensure even consistency.
– This helps distribute pigments evenly, preventing streaks or clumps.
Strain the Paint
– Strain the paint before application to remove any impurities or lumps.
– This extra step contributes to a smoother finish by eliminating potential debris in the paint.
Pro Tips for a Smooth Finish when Interior Painting
Apply a Thin, Even Coat
– Avoid applying thick coats of paint, as they can lead to drips and an uneven finish.
– Apply thin, even coats, allowing each layer to dry completely before adding the next.
Work in Sections
– Divide the wall into manageable sections and focus on one area at a time.
– This ensures that you can maintain a wet edge, preventing lap marks and uneven drying.
Feather the Edges
– Feathering the edges involves lightly brushing or rolling over the edges of the painted area.
– This technique helps blend the paint seamlessly and prevents visible lines between sections.
Keep a Wet Edge
– Always maintain a “wet edge” to prevent lap marks when painting larger surfaces.
– Work quickly and efficiently, ensuring that the edge of the freshly painted section overlaps with the previously painted area.
Use the Right Painting Technique
– Whether you’re using a brush or roller, employ the proper technique.
– For brushes, use long, smooth strokes toward the grain.
– When using a roller, apply the paint in a “W” or “M” shape and then fill in the pattern.
Guarantee a Smooth Surface with these steps
Sand Between Coats
– After each coat has dried, lightly sand the surface with fine-grit sandpaper.
– This helps smooth out any imperfections and creates a smoother base for the next coat.
Apply Multiple Coats
– Consider applying multiple thin coats rather than one thick coat for a professional-looking finish.
– Each additional coat helps improve coverage and enhances the overall smoothness of the surface.
Use a Paint Conditioner
– Consider using a paint conditioner or extender in certain conditions, especially in hot or dry environments.
– This helps slow
Following these steps and paying attention to detail during the application process can significantly improve the likelihood of achieving a smooth and flawless paint finish on your walls.
Why Entrust Professionals?
Skillful Execution and Efficiency: Professionals bring expertise and efficiency to the table, ensuring a smooth finish in a shorter timeframe.
Assured Quality: Professionals utilize top-notch materials, guaranteeing a flawless and enduring paint job.
Emphasis on Safety: Hiring experts ensure your property’s and the painters’ safety, particularly for challenging tasks.
Peace of Mind: Delegate the complexities to professionals and enjoy peace of mind, confident that your project is in capable hands.
Conclusion
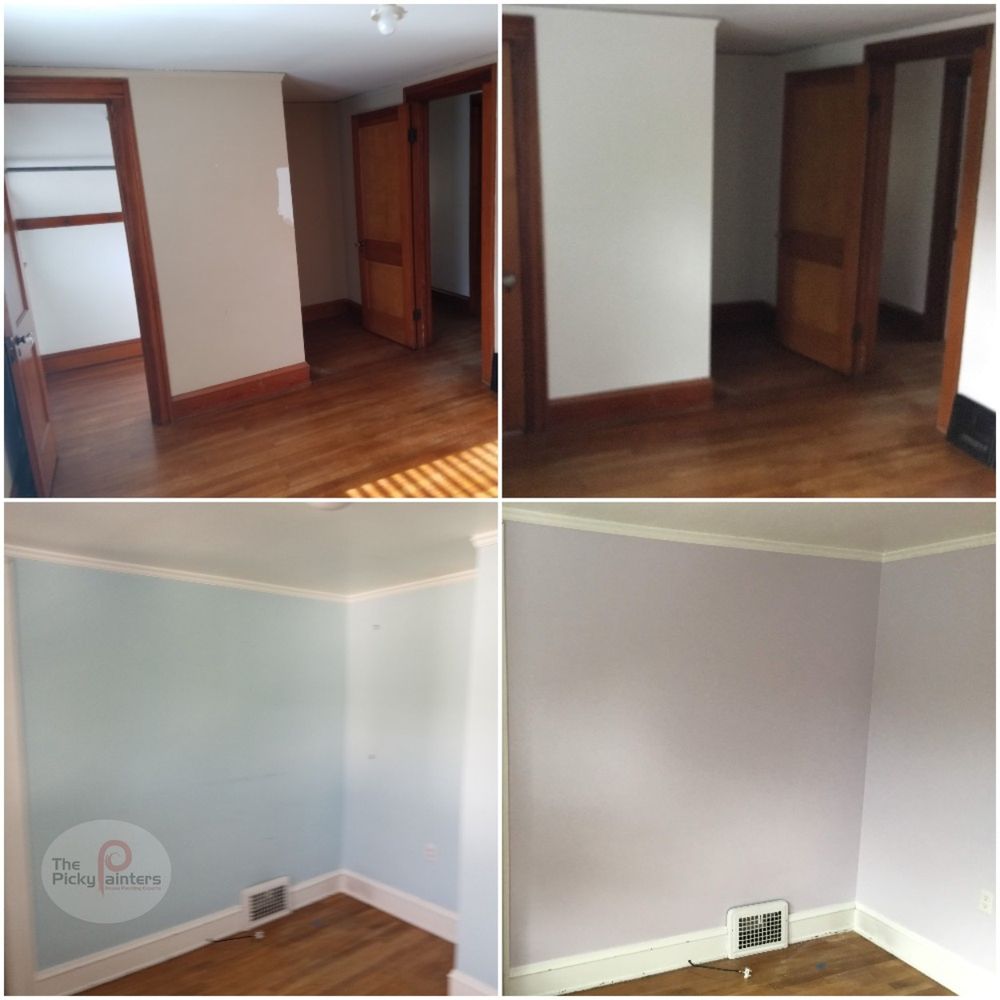
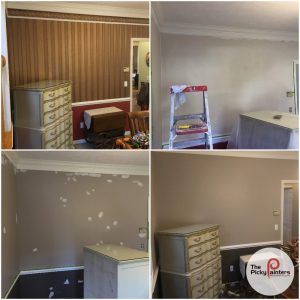
The key lies in thorough preparation for your journey to achieve perfectly smooth walls. Whether you choose to undertake a DIY project or enlist professionals like The Picky Painters in Strongsville, Ohio, a well-prepared surface paves the way for a stunning paint transformation. Never compromise on the quality of your paint job; invest in adequately preparing your interior walls for a space that radiates beauty. Explore our past projects on our website and social media accounts to witness the transformative power of a smooth finish. Prepare your space with confidence and elevate it to new heights!
FAQ
Q1: Why can’t I just paint over old walls—won’t a fresh coat hide flaws?
A1: Paint highlights imperfections rather than hiding them. Cracks, stains, or rough patches pop out more with fresh color. Proper prep ensures the paint looks smooth and lasts longer.
Q2: Is sanding really necessary if the wall looks fine?
A2: Yes. Even walls that “look” smooth often have tiny bumps or gloss that prevent paint from gripping. A light sanding creates a surface your paint can cling to like a solid handshake.
Q3: What’s the most overlooked step before painting?
A3: Cleaning. Dust, grease, or fingerprints can silently ruin adhesion. A clean wall is the invisible base layer—skip it, and no amount of expensive paint will save the result.