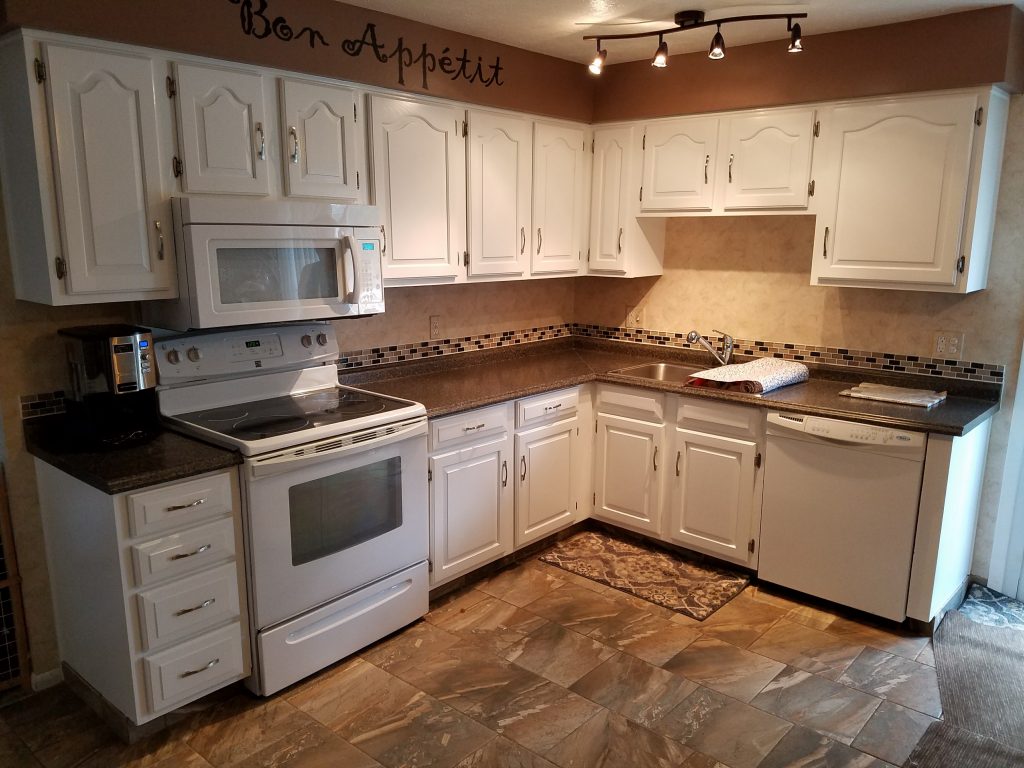
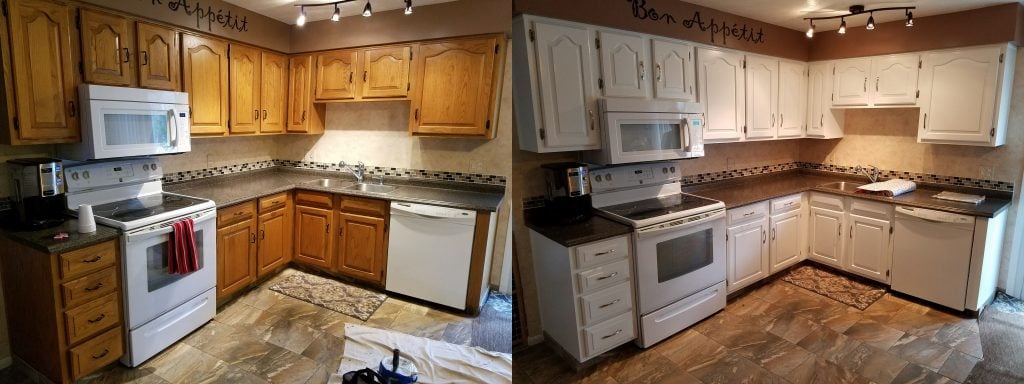
If you don’t know how much new soft close cabinet hinges cost, let us tell you that they can be expensive enough to disrupt your budget. What about painting your exposed kitchen cabinet hinges with a dated finish? Well, you can paint them to save a significant amount of money.
If you are looking to install soft close hinges, they do not work with all types of cabinet doors. So this is an excellent option if you want to change the look of your kitchen.
Preparing to paint your kitchen cabinet hinges is probably the most complex and most time-consuming part of the project – be it DIY or Professional. Once you have gathered all the materials, it should be an easy process.
Today’s article will describe how to paint your exposed kitchen cabinet hinges. Follow the steps below to complete the job accurately and without trouble. Read on!
Tip: We recommend not to use an all-purpose primer. Instead, it would be best if you used a metal etching primer. This ensures the adherence of the paint. In addition, high-quality paint gives the hinges a beautiful and professional finish. So, keep these things in mind.
Painting Kitchen Cabinet Hinges
Step 1: Cleaning the Hinges and Screws
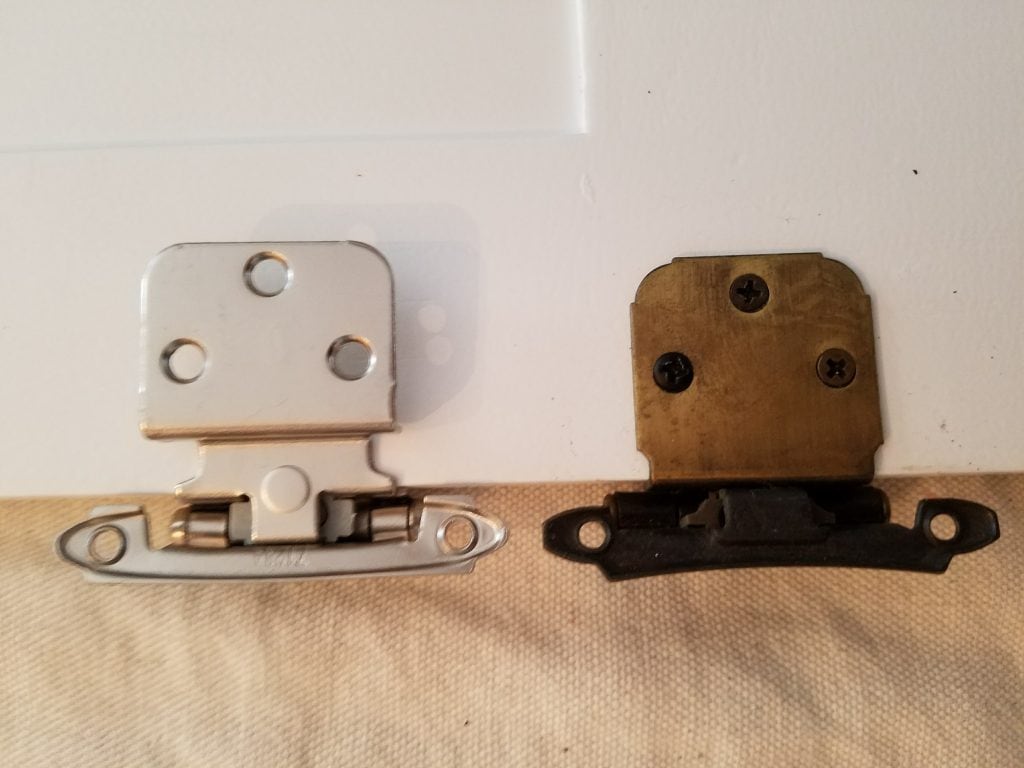
First, you must remove the hinges from cabinet doors using a drill. For safekeeping, you must place all the screws in a small cup or a sandwich bag.
Next, put all the screws and hinges in a large container or 5-gallon bucket with a 1/2 cup of degreasers like simple green or krud Kutter and some hot water. Let them soak for at least an hour, scrub them with a toothbrush, and set them on a towel to dry.
Once you are done, you will want to transfer them all to a new dry towel to finish drying so they are ready for paint.
Step 2: Prepping the Screws for Paint
You need to push the screws into the polystyrene foam sheet or cardboard and make sure you leave the heads exposed. Make sure you did an excellent job with the toothbrush and removed all the paint, grease, and dirt from the screws.
Step 3: Prepping the Hinges for Paint
It would help to have a large cardboard piece to place the hinges. If you don’t have cardboard or rosin paper, you can use a clean work table in a ventilated area. To spray the edges, you need to ensure leaving enough space between the hinges. Again, make sure it is a clean sheet.
Step 4: Spraying the Primer Coats
This step requires you to shake a spray can of etching primer that is best for metal, followed by an oil-based paint for the finish of your choice. Follow the instruction on the package that the manufacturer recommends. You can position the can at the recommended distance from the hinges.
Spray a light coat on the hinges. Also, spray on the screw heads. Again, you must ensure the spray is a light coat of the primer using steady and even sweeps. Don’t forget the edges and sides.
Shake the CAN frequently as you continue spraying. Following the manufacturer’s instructions, give the time for the primer to be dried.
Once dried, you can apply the second coat of the primer. Allow it to get dry completely. It is always better to do thin coats, but you may have to do multiple coats in you do not have that much experience spray painting.
Step 5: Spraying the Finish Coats
In this step, you need to use steady and side-to-side strokes to maintain a consistent distance to ensure a uniform painting coat on the hinges. Again, shake the can while you continue spraying. Don’t forget the edges and sides. Allow the paint to dry for the time the paint manufacturer recommends.
Now, apply the second coat of paint. Allow it to dry completely overnight so you don’t have any issues.
Conclusion
Wrapping up, here is a list of a few things you need To paint your exposed kitchen cabinet hinges
- Such as a cup or sandwich bag
- Drill
- Toothbrush
- Towels
- Clean cloths
- Polystyrene foam or cardboard
- Rust-inhibiting etching primer
- Your choice of spray paint
- heavy-duty gloves when using a degreaser
Good Luck!
If you’re looking for assistance on your kitchen cabinet refinishing project, give us a call or schedule an estimate below!
Pro Tips:
- Do this outside or in a well-ventilated area
- Make sure to give proper dry time between each coat of paint and primer
- Don’t get too close to the hinges when you start spraying
- Practice spraying on some cardboard first
- Make sure you have everything you need before you start the project
Thanks for reading. If you have any other questions about this topic or painting, email me at joe@thepickypainters.com or look at our other articles.
FAQ
Q1: Can exposed kitchen cabinet hinges really be painted, or will the paint just chip off?
Yes, they can be painted if you prep them well—clean off grease, lightly sand, and use a metal primer first. Without that prep, the paint likely won’t last.
Q2: Why would someone paint hinges instead of buying new ones?
Painting is a cost-friendly way to refresh cabinets without replacing hardware. It’s also a creative choice—perfect for matching custom colors or creating a seamless, modern look.
Q3: Will painted hinges ruin the smooth opening and closing of cabinets?
Not if you’re careful. If paint builds up on pivot points, hinges can stick. The trick is to apply thin layers and avoid painting the moving parts directly.
